Table of Contents

- How to Install an Affordable Star Ceiling? Fundamental Principles in 2026
- How to Install an Affordable Star Ceiling? Economical Material Selection in 2026
- How to Install an Affordable Star Ceiling: A Step-by-Step Installation Guide
- Affordable Star Ceiling Installation and Decorative Trends: Why Is It Popular in 2026?
- Common Mistakes and Solutions in Affordable Star Ceiling Installation for 2026
- Frequently Asked Questions (FAQ)
For instance, according to 2026 data, approximately 18% of spending on home decor goes towards ambient lighting designed to create a spa or cinema atmosphere at home. So, how do you install an affordable star ceiling? This very question highlights how accessible it has become to bring this captivating effect into your home. However, many people think it's complex and expensive. Therefore, with today's ready-made kits and the right knowledge, it has evolved from a trend into a smart home improvement investment. In this guide, we will explain step-by-step how you can bring this impressive decor to life without straining your budget.
How to Install an Affordable Star Ceiling? Fundamental Principles in 2026

In fact, installing an affordable star ceiling in 2026 is possible by choosing the right ready-made kit and following simple steps. The basic principle is to connect fiber optik cables to a light source, distribute them across the ceiling surface, and then cover them with a decorative finish. In short, the most effective way to reduce cost is to purchase a ready-made, economical kit that perfectly matches your needs.
Current Economical Solutions in Star Ceiling Technology
As technology advances, LED efficiency increases and production costs fall. This means that in 2026, you can find higher-quality ready-made kits at prices 25-30% more affordable compared to previous years. For example, the backbone of economical solutions is distributing light from a single powerful light source (projector) through hundreds of thin fiber optik cables. This "central system" architecture provides an incredible cost advantage compared to using a separate LED for each star.
DIY or Ready-Made Kit: Which Is More Suitable For You?
The answer to this question is directly proportional to your skill level and available time. If you lack technical knowledge and want quick results, a ready-made star ceiling kit is your best bet. Indeed, in 2026 the market offers a wide range of kits, from entry-level to professional results. For example, our article comparing the differences between ready-made star ceiling kits will guide you. The DIY (Do-It-Yourself) option means purchasing and assembling each component separately; this requires deep technical knowledge and time, and often ceases to be affordable.
How to Install an Affordable Star Ceiling? Economical Material Selection in 2026
The most cost-effective material for an economical star ceiling is ready-made kits consisting of hundreds of fiber optik cables connected to a single light source. In 2026, LED projectors remain the most efficient option in terms of power consumption and longevity. Furthermore, the factors that most affect cost are the number of cables, the power of the light source, and animation features. For example, mini kits are ideal for starting projects in children's rooms or small rooms.
Light Source Comparison: LED Projector vs. RGB+W Modules
Light source choice directly impacts the balance of cost and performance. Most economical projects use single-color (usually white/blue) or color-changing (RGB) LED projectors. RGB+W (White) modules offer higher control and color purity but increase the price. In short, let's make a simple comparison:
| Feature | LED Projector (Economical) | RGB+W Module (Premium) |
|---|---|---|
| Average Cost (2026) | 450 - 800 TL | 1200 - 2500 TL+ |
| Advantage | High light output, low energy consumption, simple installation. | Full color control, high color accuracy, smart home integration. |
| Disadvantage | Color options may be limited, animations are simple. | More complex installation, significantly increases total project cost. |
| Suitable For | First-time users, budget-focused projects, children's/teen rooms. | Those wanting a professional look, those who value color therapy, luxury projects. |
Fiber Optik Cable Thickness and Durability
Fiber thickness (diameter) determines two things: the brightness of the light point and the kit's price. Furthermore, fibers with a diameter of 0.75mm or 1.0mm are the most commonly used in economical kits. You can purchase thinner fibers more cheaply and use a greater number of them, but light transmission may be lower. Thus, in terms of durability, fibers made from "PMMA" material offer UV resistance and flexibility, which is critical for a long-lasting, affordable star ceiling installation.
Comparing Affordable Star Ceiling Kits in 2026
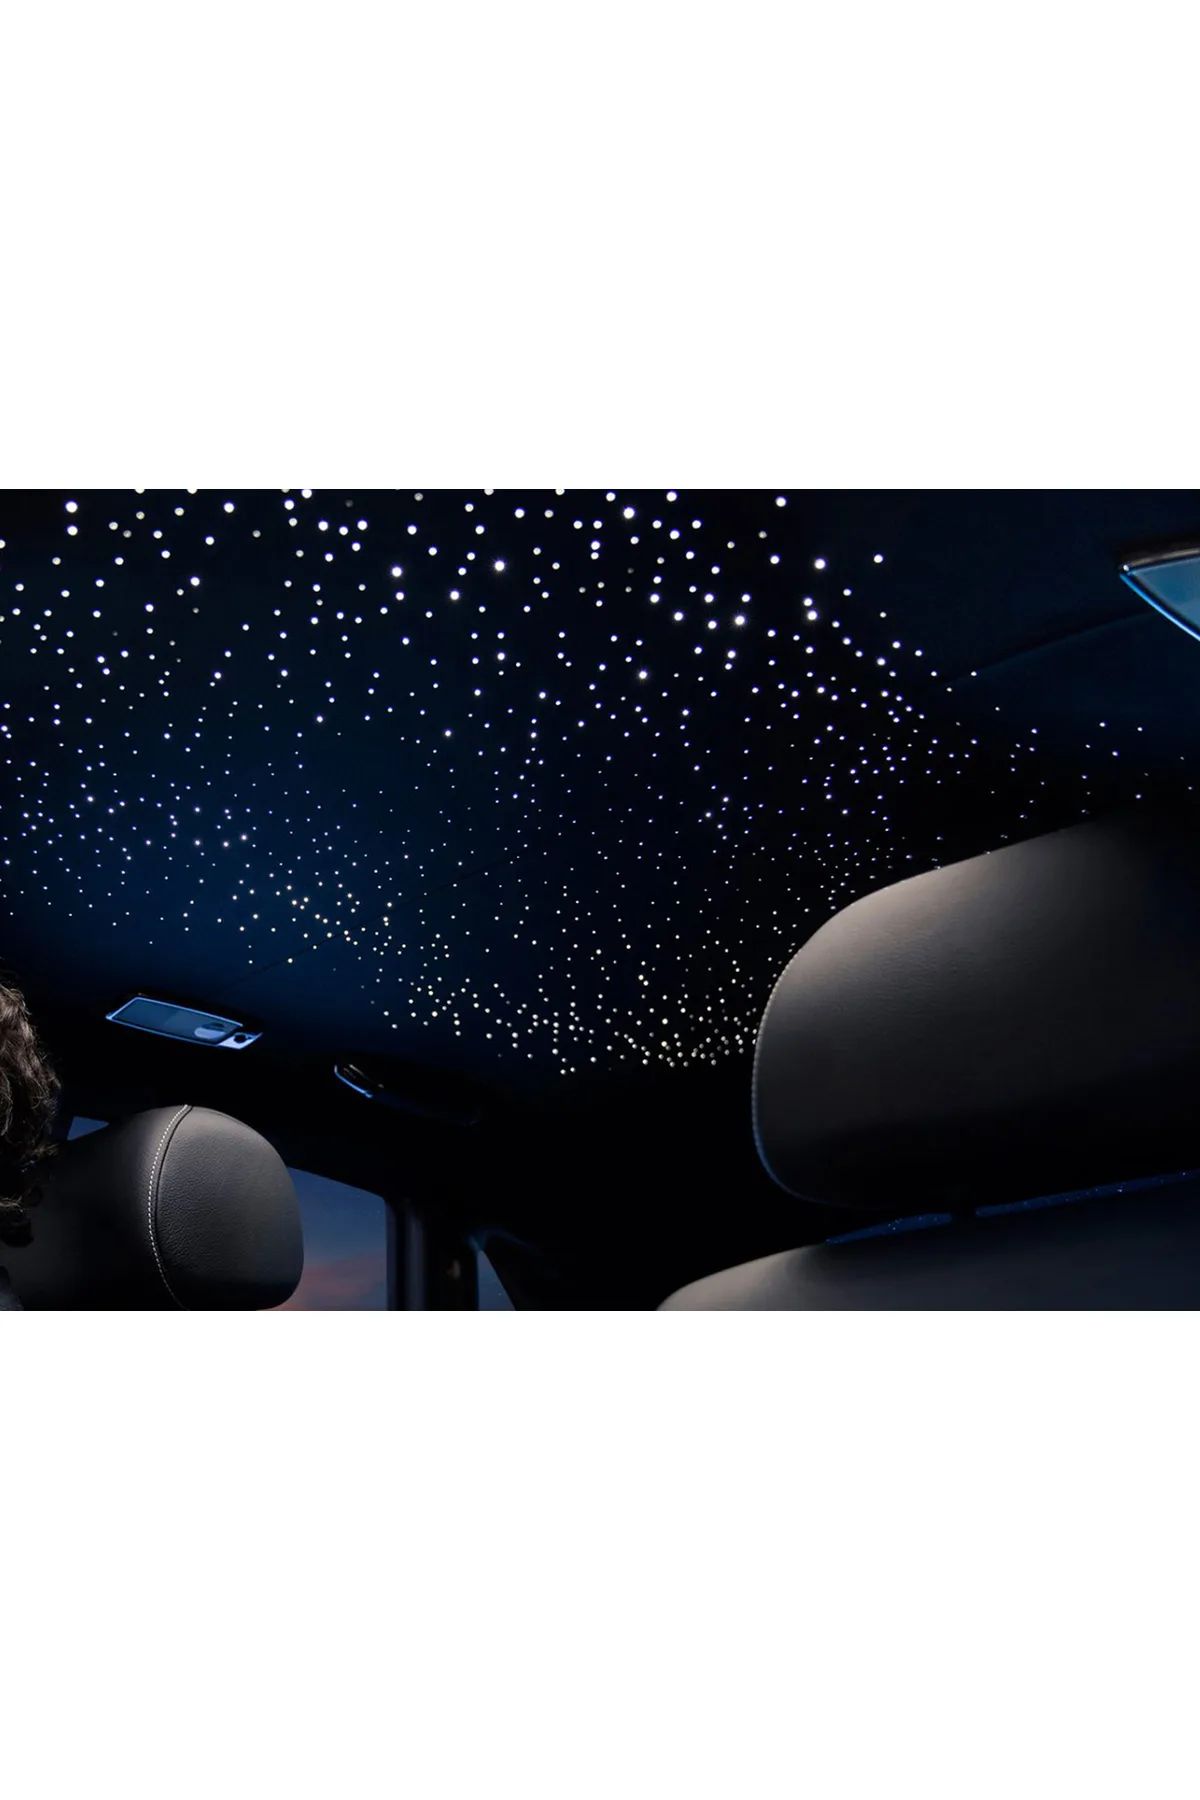
For example, understanding the different affordable kits on the market helps you make the right choice. For instance, the Ready-to-Install 'MEGA' Fiber Optik Star Ceiling Kit offers high fiber density for large areas, while the YOUNG ROOM STAR CEILING COLORED FIBER OPTIK LIGHTING AMBIENCE KIT - MINI is ideal for small rooms. Consequently, kits like BUS AMBIENCE LIGHTING FIBER OPTIK STAR CEILING KIT - MOVING STARS - ECO PRO have durability features specific to vehicles. Therefore, when searching for an answer to how to install an affordable star ceiling, you will encounter space-specific kits.
A common misconception in the industry is that thicker fiber is always better. In fact, for a 10 m² room, 500 fibers of 0.75mm will provide a much more realistic and dense starry sky effect than 300 fibers of 1.0mm. The key is the right density.
How to Install an Affordable Star Ceiling: A Step-by-Step Installation Guide

Affordable star ceiling installation consists of 5 basic steps: 1) Map out your ceiling plan and determine the light source location. 2) Secure the light source (projector/module). 3) Connect the fiber optik cables to the light source. 4) Adhere the fiber ends to the ceiling surface according to your design. 5) Make the electrical connection and test the system. Additionally, ready-made kits provide all necessary materials (adhesive, connection fittings) for these steps.
Planning and Creating a Cable Distribution Map
The first step is to sketch your ceiling and decide where the projector (light source) will be placed. You can typically hide the projector inside a cabinet, behind a false ceiling, or in an accessible corner. Following this, plan the distribution of the fiber cables. For a natural look, distribute the cables randomly and avoid grouping them into constellations. Furthermore, this stage is a critical planning phase that also applies to the key points of installing a star ceiling in a car roof.
Securing the Light Source and Connecting the Cables
Secure the light source in your chosen location, allowing for air circulation. Because overheating is a primary factor that shortens LED lifespan. Connect the fiber bundle from the ready-made kit to the projector's connection point (optical coupler). This is usually done with a clamping screw. However, be careful not to overtighten the fibers, otherwise light transmission will decrease.
Adhering Fibers to the Ceiling Surface and Testing Phase
This is the most enjoyable part. Temporarily plug in and turn on the projector. Then, ensure light is coming from the ends of the fibers. Next, adhere the end of each fiber to the planned point on the ceiling surface using the special adhesive or silicone included with the kit. After all fibers are placed, run and test the system for a few hours. Finally, if desired, the fiber ends can be covered with ceiling paint or hidden with a special starry ceiling fabric.
Affordable Star Ceiling Maintenance Tips
Once your system is installed, you can apply simple maintenance tips for longevity. First, ensure the area where the projector is located is dust-free and well-ventilated. Also, dust buildup on the fiber ends can reduce light output; therefore, you can gently clean them once a year with a dry, soft brush. This way, you preserve the value of your affordable star ceiling installation investment.
Checklist for a successful installation:
- Was sufficient cooling space provided for the projector?
- Are all fibers connected tightly and properly to the light source?
- Were the fibers overly bent when adhering them to the ceiling surface?
- Did the system run uninterrupted for at least 3 hours?
- Is the light intensity homogeneous across the entire ceiling?
Affordable Star Ceiling Installation and Decorative Trends: Why Is It Popular in 2026?
Behind the popularity of affordable star ceiling installations in 2026 lies the search for 'premium' yet accessible luxury. Moreover, the desire to create a spa, hotel, or observatory atmosphere in personal spaces is strengthening this decorative trend. Economical kits allow you to bring this special ambiance into your home or business at much lower costs.
"Premium" Decoration Mindset and At-Home Spa Atmosphere
In 2026, the word "premium" has evolved to mean not expensive, but valuable and personalized. Much like choosing jewelry, people want to personalize their spaces and add emotional value to them. Furthermore, star ceilings have become an indispensable part of at-home spa, meditation corner, or relaxation room concepts. The dim, soothing light radiating from hundreds of points via a single light source is seen as an effective tool for reducing stress.
Space-Specific Themes and Color Choices
Economical kits are no longer limited to just white or blue light. On the other hand, in 2026, themes like sky blue, purple dawn, golden yellow, or slow color-fading RGB effects are prominent. Conversely, vibrant colors for children's rooms and calm pastel tones for bedrooms can be chosen. Therefore, this flexibility makes the affordable star ceiling installation adaptable to every room. For example, bus or minibus fiber optik star ceiling installation details also show how these themes are applied to vehicles.
2026 Buying Guide: What to Consider When Choosing an Affordable Star Ceiling Kit
Choosing the right kit directly impacts your project's success and cost efficiency. First, accurately measure your ceiling area and calculate the number of cables needed, aiming for at least 50-70 fibers per square meter. Second, check the light source's power consumption and warranty period. Third, consider the durability requirements of kits designed for commercial spaces like RESTAURANT, CAFE AMBIENCE LIGHTING STAR CEILING FIBER OPTIK APPLICATION KIT. Therefore, by clarifying your needs and deciding based on these criteria, you will find the most cost-effective solution.
Common Mistakes and Solutions in Affordable Star Ceiling Installation for 2026

The most common mistake in affordable star ceiling installation is choosing a kit with an insufficient number of cables for the area. This results in a sparse and ineffective appearance. Another mistake is bending fiber cables too tightly or running them over sharp edges, which leads to light transmission loss. The solution is to choose a kit with the appropriate cable density per square meter and to avoid cable kinks during installation.
Insufficient Light Density and Sparse Appearance
The most disappointing outcome is seeing sparse, faint dots instead of the expected magical sky. This is usually caused by the total number of fibers in the kit being insufficient relative to the ceiling area. For example, according to 2026 standards, at least 50-70 fibers per square meter are recommended for satisfactory density. Therefore, an economical kit with 500-700 fibers for a 10 m² room will yield a result close to ideal.
Incompatibility with Electrical Wiring
Economical kits typically operate with a 12V or 24V power adapter. A critical mistake made is leaving this adapter plugged into a constantly active outlet and allowing it to overheat. Another issue is the lack of access to an outlet where the projector is installed (e.g., behind a false ceiling). Therefore, the solution is to plan the electrical layout before installation and position the adapter in an easily accessible location with airflow. However, ensuring the power supply has a warranty longer than 3 years is also a long-term solution.
Frequently Asked Questions (FAQ): Everything About Affordable Star Ceiling Installation
Conclusion and Summary: Your Starry Ceiling Dream Is Now Very Close

As you can see, the answer to how to install an affordable star ceiling? lies in proper planning, correct material selection, and a step-by-step installation process. To summarize:
- Planning is Essential: Determine your ceiling type, area, and budget. Remember the rule of at least 50-70 fibers per square meter.
- Choose Quality Equipment: A projector with high lumens and a long warranty, along with quality fiber optik cable, is the key to long-term satisfaction.
- Apply with Patience: Creating a fiber placement template and meticulously placing each fiber guarantees a professional look.
- Pay Attention to Electricity and Safety: Position the power supply in a suitable location and make all connections securely.
A star ceiling is a project that adds not just light, but character and soul to your home. Creating this magical atmosphere no longer requires huge budgets.
You now have all the information. It's time to bring the sky of your dreams to your ceiling. At CoraxAds.com, we are by your side with high-quality star ceiling kits for every budget and professional consultancy. To start your project, review our products, and get a personalized offer, visit our website now. Your magical ceiling is just a click away!